Hey all,
First I want to say thank you to all who have visited the blog and continue to do so. The viewership continues to grow which means a lot.
Footwear topics overall are the most searched for, so I plan on finishing out the reviews on the Meindl Perfekt and the Asolo Sasslong boots. Both of the boots have served me well, and I as sit here typing I am wearing the Sasslongs.
This was a tough year for mule deer hunting, with near success on better deer than last seasons. I have started a blog on some of the lessons learned from this season. My desire to pursue Mule Deer only got worse this year and plans are already in the works for next years hunts.This will be the next piece that I finish up.
I will soon be including a link to a website I frequent often as a forum member with an article that is in the editing phase. This article will be on hunting antelope and covers several tactics, and some success and failure as a hunter. Overall it was a really fun piece to write and has been a very good experience to learn and grow from.
I am also going to be working on a blog series on how to improve as a field photographer. I have some work to do when it comes to improving my photography. Documenting this is going to go a long way to help myself and others. The first in the series is going to be on overtaking pictures, and by that I mean taking more than one picture of the same thing to have plenty to work with when writing and editing.
There is also going to be a comparison blog between the Seek Outside BCS and LBO. This will be about what each shelter is good for, and why you would buy one over the other. The shelters have some similar beginnings, and to some extent shapes but overall are very different shelters.
By late this spring there is also another fun project coming up that I hope will really peak the interest of many. Currently I own a Kifaru Koala standard in black and a friend from Tennessee owns both models of the Hill People Gear's Kit Bag. We are both going to do individual write ups of each of them and post it here. Then I will be shipping my Koala to him to look at, use, and then write a review. After he is done, they will both be shipped to me for testing and comparison and of coarse a write up.
Finally, my biggest and likely most ambitious blog is going to be about why I hunt. I don't have any problem admitting that I trophy hunt for Mule deer, but when it comes to elk I am much more of a meat hunter. Don't get me wrong that I want to accomplish the task of taking a very large Elk. However, several years ago I wanted to accomplish the task of eating nothing but wild game meat that I or a partner had harvested myself. Having recently finished "Meat Eater" by Steven Rinella, that desire is back. Starting in 2013, my goal is to consume as much wild game as possible rather than store-bought meats. So, this will be where I document that.
Leave any and all comments of what you would like to find out in some of these topics! Feedback would be great!
Monday, December 3, 2012
Monday, November 19, 2012
More Than A Teaser: Lil Bug Out
The last post I gave on the Little Bug Out(LBO) from Seek Outside(SO) was a teaser to peak some interest. This post will be about giving a healthy picture of what to expect if you purchase one to serve as your next backpacking/camping shelter.
Bear in mind as you read this, I don't review a product with the intent of selling it, or advertising it. This is about discussion of quality products and hopefully what is written here will help you make the decision of whether or not you want to add this to your arsenal.
Background:
This year has been a shorter hunting season in terms of days spent in the hills compared to other years. However, I have still spent close to 30 nights on the ground in some kind shelter. Normal year it could get as high as 50 nights depending on time off. Every trip requires a serious evaluation of what needs are there in terms of the trip at hand. Things obviously such as number of people, temperature ranges expected, precipitation, etc. All of this factors into what shelter will be coming with me.
Generally I categorize everything in terms of people/weather. So for instance if there are three people going on a summer trip, I will be reaching for my SO 6. If it's going to be cold weather with the same number of people then it will be SO 6 and SO medium wood burning stove. If it's a solo trip in warm weather then the TiGoat V5 will be coming with me, if there is cold weather planned then the stove makes the cut as well.
When there is wet weather heading my way that could limit me to the shelter for long periods of time the SO 6 with stove will be making the cut. There is nothing worse than sitting in a tent for long hours waiting for a storm to pass and not having heat or the ability to stand up.
So that brings us to an interesting place with the LBO, this shelter can just about meet any and all needs up to 4 people. It can go with, or without a stove, or you could put a stove jack in just about any of the separate pieces if you so desired.
Introducing the LBO:
The toughest thing to examine with the LBO is that it can be categorized in the solo, double, and multi person shelter niches. A stove jack is possible in just about all of the configurations, and could easily be managed in multiple set ups.
List of Set Ups:
Base
Base+ Base
Base+Vestibule
Base+Tarp
Base+Tarp+Base
Base+Tarp+Vestibule
Tarp+Vestibule
Tarp
All of the square footage measurements are listed here:
http://seekoutside.com/products/ultralight-tipis/little-bug-out-shelter/
Really the options are near endless. Even with standard set ups little things can be adjusted that will allow you to change things even further for features such as airflow during the summer months.
Uses:
This section will come across fairly arbitrary because the shelter can be used for anything, and just about everything shelter wise in the back-country world. It really is that versatile. So bear with me as we look at the uses.
To save some redundancy a trekking pole, or one of the poles that SO sells on their website will be up to the task of suspending the shelter. For testing purposes I was given one of the SO poles to use in combination with the Back Country Shelter pole I already own. SO's poles are made of carbon fiber that telescopes inside of itself to save space in packing.
Also for the sake of not being redundant, the nest can be used with any of the combinations that have the base. The nest gives you the advantages of a floor, and double walled shelter with out having to take off your boots to be inside when combined with the other pieces. The nest can also offer a slight improvement in temperature, as well as protection from the bugs that are often out in force.
Make sure and set up the Nest ahead of any trip at home inside the base several times to practice getting the correct pitch. Floorless center pole shelters tend to have a range of pitches that could be considered effective, rather than just one that comes with your standard tent. When you add the nest the floor needs to be attached to the base ahead of time with some form of cordage. The correct floor space matches the floor of the nest. If the Base is pitched too short, the nest will appear saggy. If it is pitched it too tall it will be saggy on the back end with the floor not wanting to stay on the ground.
Here is a video link to the correct set up for base and nest:
http://www.24hourcampfire.com/ubbthreads/ubbthreads.php/topics/6880820/1/New_Shelter_Little_Bug_Out
One by one I will look at the effective uses for the many arrangements of the shelter, and make some suggestions to what each would and would not be good for.
Base:

The base alone is a three sided shelter that according to the SO website sits at about 43 square feet. The measurements provided are accurate and there is plenty of space for two to sleep overnight when the situation calls. For my height and size it won't be a double shelter in this form. For me moving solo, light and quick, it will function perfectly.
When it comes to an emergency shelter this will function very well, as well as a bivy shelter. When hunting the higher elevations it is sometimes necessary to stay in one place to keep tabs on an animal. This shelter will function well for that purpose during the early season.
6 stakes are necessary when planning to use the hook off of the beak for stability with a guy-line.
Base +Base

This is the set up I foresee being most widely used for double trips, and can cover a variety of needs, especially with a stove jack install. For a solo trip this shelter would be a castle and could certainly operate in that capacity. At roughly 86 square feet there is plenty of room for one and gear, and for two with gear if you don't mind being cozy.
Dual doors in this set up make for a shelter that is very easy to achieve good airflow as well as not having to trip over your buddy in the middle of the night to visit the bathroom if you laid parallel to the long walls.
One weakness during spring/early summer/summer use would be that there aren't bug screens. This can be negated with the use of a nest in one side or the other, but bug protection would be limited to the sleeping area. For most that come from the tent with vestibules formed by the rain fly this is not a new concept.
For winter use a stove jack could easily be installed at the peak, with this set up requiring 8 stakes.
Base+Vesibule

This set up can simply be described to some degree as a smaller set up of the Base + Base with some notable differences. This will be my go to set up for June and early July mule deer solo scouting trips.
Solo trips would be my preference in this configuration, but double without gear inside would be possible. Because I tend to leave unnecessary gear at camp while hunting, and most of my partners do the same, more than one would be tight for gear and doubling up. If I am with my wife on a summer overnight fishing trip this would be perfect.
One notable feature is that the Base I tested had beaks that come off the front at the top for several inches and offer very strong protection of the zipper in wet weather. Simply guy out the base over the top of the vestibule and your zippers are protected from any water draining down them. Guying out the beak also adds to stability in rough wind conditions.

This is a 6 stake configuration, and possibly seven with the guy out for the beak.
Base+Tarp
In warm weather conditions when 2 people wanted to be able to spread out a bit, keep their gear inside and still have a little extra space, this would be the set up. If air flow was desired, open up one side of the tarp, or simply lift the bottom of the base as shown in the photo below.
A stove could be used in the middle of the tarp to provide some heat if desired during early hunting season weather.
Base+Tarp+Base
 (The photographer requested I mention this isn't pictched
as well as he would prefer)
The is the largest configuration square footage wise and could fit three people and gear fairly easily. 4 users could be done as well if some of the gear were stored outside. The floor space is close to the same as what my 6 man offers, with a couple of clear distinctions.
First, a flat sided shelter such as this makes it easier to get closer to the wall with sleep systems. That alone helps organizationally when planning where to sleep. To some this may be a small thing, but the primary role of any shelter is comfortable sleep. Placement of every individual matters, especially in the single wall section where rolling into the wall and ending up wet is a risk.
Second, there is a little space lost in terms of storage inside the shelter compared to a tipi of the same floor footage. The combination of Thermarest NeoAir and space my body takes forces an offset from the tipi wall. That space is where I tend to store my rifle, spare food, and other needed odds and ends that don't make the daypack cut. That "dead" storage space is nice when the stove is packed in, stacks of firewood take up room on the floor and its nice to have the extra space to work with.
For winter camping this could be comfortable with the stove jack in place in the tarp and heating the entire shelter from the middle. There would also be enough space to hang clothes to get them dry during winter hunts. This is far and away the best feature of any shelter that uses a wood burning stove of any kind. The LBO is no exception.
The biggest challenge in this will be finding the proper place to set it up. Because it is a long rectangular shape in floor space, finding an area of ground that is flat enough to not create gaps where the tarp meets the ground between both bases could be hard in steep country. The gaps wouldn't be an issue in the bases when a nest is used, but it will require some planning when it comes to placement of the tarp.
10 stakes are required as well as two poles.With all of the pieces it would be wise to split the load between partners when preparing to use this shelter.
Base+Tarp+Vestibule
This set up is very similar to the BTB, so not much time will be spent explaining it. Simply substitute one of the bases with the Vestibule and you have it. It is less floor space the BTB set up but most of the considerations are the same.
3 people would be the max I would want, and gear would be a tough fit, especially with a stove.
This is a 2 pole set up requiring 8 stakes, and possibly nine if you chose to guy out the vestibule end.
Tarp+Vestibule
The tarp and vestibule set up is pretty similar what SO used to offer with their tarps. The major difference is that the closed end can be attached or detached depending on preferences. This would primarily be a light and fast set up and could easily function as a stand alone shelter or emergency bivy.
The possibility is also there to add a second vestibule to the other end and make it completely enclosed. When set up this would be very similar to the pup style tent that my Dad grew up using while in the boy scouts. The biggest differences would be that there is much more space, and you can enclose both ends. For quick overnight scouting trips, this form of the shelter would perform very well.
Tarp
The tarp alone is just that, a rectangular piece of waterproof material that can be used with poles and guyouts, guy outs alone, etc.
The only disadvantage to this tarp could be the possible weight added by the zipper attachment points. The advantage to using this tarp for extremely lightweight travel is that you own it as part of an entire LBO system rather than having to own an entirely separate shelter to take this role.
Packed Down:
The LBO can easily compress down to fit in just about any pack. Below you can see that a full Base+Tarp+base as well as a nest could easily fit in my Dragon Slayer from Mystery Ranch. The Dragon Slayer's claim is 2300cui and you could easily fit whatever LBO design you chose inside.
 For relative size you can see the Primus Fuel canister placed next to the LBO. For any of the smaller set ups it can be stuffed into just the one stuff sack, and with a little effort nest base and vestibule could fit.
Another nice feature is that the stuff sacks are directly attached to Base shelter. No more wondering where the stuff sack went in high wind conditions.
To Sum It Up:
This is a shelter from a quality company that functions in many roles. Buy with confidence if you have defined what you expect from every set up.
Bear in mind as you read this, I don't review a product with the intent of selling it, or advertising it. This is about discussion of quality products and hopefully what is written here will help you make the decision of whether or not you want to add this to your arsenal.
Background:
This year has been a shorter hunting season in terms of days spent in the hills compared to other years. However, I have still spent close to 30 nights on the ground in some kind shelter. Normal year it could get as high as 50 nights depending on time off. Every trip requires a serious evaluation of what needs are there in terms of the trip at hand. Things obviously such as number of people, temperature ranges expected, precipitation, etc. All of this factors into what shelter will be coming with me.
Generally I categorize everything in terms of people/weather. So for instance if there are three people going on a summer trip, I will be reaching for my SO 6. If it's going to be cold weather with the same number of people then it will be SO 6 and SO medium wood burning stove. If it's a solo trip in warm weather then the TiGoat V5 will be coming with me, if there is cold weather planned then the stove makes the cut as well.
When there is wet weather heading my way that could limit me to the shelter for long periods of time the SO 6 with stove will be making the cut. There is nothing worse than sitting in a tent for long hours waiting for a storm to pass and not having heat or the ability to stand up.
So that brings us to an interesting place with the LBO, this shelter can just about meet any and all needs up to 4 people. It can go with, or without a stove, or you could put a stove jack in just about any of the separate pieces if you so desired.
Introducing the LBO:
The toughest thing to examine with the LBO is that it can be categorized in the solo, double, and multi person shelter niches. A stove jack is possible in just about all of the configurations, and could easily be managed in multiple set ups.
List of Set Ups:
Base
Base+ Base
Base+Vestibule
Base+Tarp
Base+Tarp+Base
Base+Tarp+Vestibule
Tarp+Vestibule
Tarp
All of the square footage measurements are listed here:
http://seekoutside.com/products/ultralight-tipis/little-bug-out-shelter/
Really the options are near endless. Even with standard set ups little things can be adjusted that will allow you to change things even further for features such as airflow during the summer months.
Uses:
This section will come across fairly arbitrary because the shelter can be used for anything, and just about everything shelter wise in the back-country world. It really is that versatile. So bear with me as we look at the uses.
To save some redundancy a trekking pole, or one of the poles that SO sells on their website will be up to the task of suspending the shelter. For testing purposes I was given one of the SO poles to use in combination with the Back Country Shelter pole I already own. SO's poles are made of carbon fiber that telescopes inside of itself to save space in packing.
Also for the sake of not being redundant, the nest can be used with any of the combinations that have the base. The nest gives you the advantages of a floor, and double walled shelter with out having to take off your boots to be inside when combined with the other pieces. The nest can also offer a slight improvement in temperature, as well as protection from the bugs that are often out in force.
Make sure and set up the Nest ahead of any trip at home inside the base several times to practice getting the correct pitch. Floorless center pole shelters tend to have a range of pitches that could be considered effective, rather than just one that comes with your standard tent. When you add the nest the floor needs to be attached to the base ahead of time with some form of cordage. The correct floor space matches the floor of the nest. If the Base is pitched too short, the nest will appear saggy. If it is pitched it too tall it will be saggy on the back end with the floor not wanting to stay on the ground.
Here is a video link to the correct set up for base and nest:
http://www.24hourcampfire.com/ubbthreads/ubbthreads.php/topics/6880820/1/New_Shelter_Little_Bug_Out
One by one I will look at the effective uses for the many arrangements of the shelter, and make some suggestions to what each would and would not be good for.
Base:
The base alone is a three sided shelter that according to the SO website sits at about 43 square feet. The measurements provided are accurate and there is plenty of space for two to sleep overnight when the situation calls. For my height and size it won't be a double shelter in this form. For me moving solo, light and quick, it will function perfectly.
When it comes to an emergency shelter this will function very well, as well as a bivy shelter. When hunting the higher elevations it is sometimes necessary to stay in one place to keep tabs on an animal. This shelter will function well for that purpose during the early season.
6 stakes are necessary when planning to use the hook off of the beak for stability with a guy-line.
Base +Base
This is the set up I foresee being most widely used for double trips, and can cover a variety of needs, especially with a stove jack install. For a solo trip this shelter would be a castle and could certainly operate in that capacity. At roughly 86 square feet there is plenty of room for one and gear, and for two with gear if you don't mind being cozy.
Dual doors in this set up make for a shelter that is very easy to achieve good airflow as well as not having to trip over your buddy in the middle of the night to visit the bathroom if you laid parallel to the long walls.
One weakness during spring/early summer/summer use would be that there aren't bug screens. This can be negated with the use of a nest in one side or the other, but bug protection would be limited to the sleeping area. For most that come from the tent with vestibules formed by the rain fly this is not a new concept.
For winter use a stove jack could easily be installed at the peak, with this set up requiring 8 stakes.
Base+Vesibule
This set up can simply be described to some degree as a smaller set up of the Base + Base with some notable differences. This will be my go to set up for June and early July mule deer solo scouting trips.
Solo trips would be my preference in this configuration, but double without gear inside would be possible. Because I tend to leave unnecessary gear at camp while hunting, and most of my partners do the same, more than one would be tight for gear and doubling up. If I am with my wife on a summer overnight fishing trip this would be perfect.
One notable feature is that the Base I tested had beaks that come off the front at the top for several inches and offer very strong protection of the zipper in wet weather. Simply guy out the base over the top of the vestibule and your zippers are protected from any water draining down them. Guying out the beak also adds to stability in rough wind conditions.
Beak guy out as seen from the inside without the vestibule.
This is a 6 stake configuration, and possibly seven with the guy out for the beak.
Base+Tarp
In warm weather conditions when 2 people wanted to be able to spread out a bit, keep their gear inside and still have a little extra space, this would be the set up. If air flow was desired, open up one side of the tarp, or simply lift the bottom of the base as shown in the photo below.
A stove could be used in the middle of the tarp to provide some heat if desired during early hunting season weather.
Base+Tarp+Base
as well as he would prefer)
The is the largest configuration square footage wise and could fit three people and gear fairly easily. 4 users could be done as well if some of the gear were stored outside. The floor space is close to the same as what my 6 man offers, with a couple of clear distinctions.
First, a flat sided shelter such as this makes it easier to get closer to the wall with sleep systems. That alone helps organizationally when planning where to sleep. To some this may be a small thing, but the primary role of any shelter is comfortable sleep. Placement of every individual matters, especially in the single wall section where rolling into the wall and ending up wet is a risk.
Second, there is a little space lost in terms of storage inside the shelter compared to a tipi of the same floor footage. The combination of Thermarest NeoAir and space my body takes forces an offset from the tipi wall. That space is where I tend to store my rifle, spare food, and other needed odds and ends that don't make the daypack cut. That "dead" storage space is nice when the stove is packed in, stacks of firewood take up room on the floor and its nice to have the extra space to work with.
For winter camping this could be comfortable with the stove jack in place in the tarp and heating the entire shelter from the middle. There would also be enough space to hang clothes to get them dry during winter hunts. This is far and away the best feature of any shelter that uses a wood burning stove of any kind. The LBO is no exception.
The biggest challenge in this will be finding the proper place to set it up. Because it is a long rectangular shape in floor space, finding an area of ground that is flat enough to not create gaps where the tarp meets the ground between both bases could be hard in steep country. The gaps wouldn't be an issue in the bases when a nest is used, but it will require some planning when it comes to placement of the tarp.
10 stakes are required as well as two poles.With all of the pieces it would be wise to split the load between partners when preparing to use this shelter.
Base+Tarp+Vestibule
This set up is very similar to the BTB, so not much time will be spent explaining it. Simply substitute one of the bases with the Vestibule and you have it. It is less floor space the BTB set up but most of the considerations are the same.
3 people would be the max I would want, and gear would be a tough fit, especially with a stove.
This is a 2 pole set up requiring 8 stakes, and possibly nine if you chose to guy out the vestibule end.
Tarp+Vestibule
The tarp and vestibule set up is pretty similar what SO used to offer with their tarps. The major difference is that the closed end can be attached or detached depending on preferences. This would primarily be a light and fast set up and could easily function as a stand alone shelter or emergency bivy.
The possibility is also there to add a second vestibule to the other end and make it completely enclosed. When set up this would be very similar to the pup style tent that my Dad grew up using while in the boy scouts. The biggest differences would be that there is much more space, and you can enclose both ends. For quick overnight scouting trips, this form of the shelter would perform very well.
Tarp
The tarp alone is just that, a rectangular piece of waterproof material that can be used with poles and guyouts, guy outs alone, etc.
The only disadvantage to this tarp could be the possible weight added by the zipper attachment points. The advantage to using this tarp for extremely lightweight travel is that you own it as part of an entire LBO system rather than having to own an entirely separate shelter to take this role.
Packed Down:
The LBO can easily compress down to fit in just about any pack. Below you can see that a full Base+Tarp+base as well as a nest could easily fit in my Dragon Slayer from Mystery Ranch. The Dragon Slayer's claim is 2300cui and you could easily fit whatever LBO design you chose inside.
Another nice feature is that the stuff sacks are directly attached to Base shelter. No more wondering where the stuff sack went in high wind conditions.
To Sum It Up:
This is a shelter from a quality company that functions in many roles. Buy with confidence if you have defined what you expect from every set up.
Monday, November 5, 2012
Seek Outside LBO: Teaser Blog
I haven't put anything up because I honestly have a slew of blogs coming. This has been a busy hunting season and I have much to post on.
However, I wanted to keep new information coming for the sake of the blog's viewership coming back.
Several months ago I was approached about testing out the Little Bug Out for Seek Outside and I said absolutely. After a week with it I am going to post a few pictures just for fun.
A longer blog of initial impressions is coming and hopefully some solid information on how to best use this shelter.

This picture was taken in obnoxious winds as you can likely tell from the one side taking the largest hit. It handled the wind flawlessly and performed very well in rough conditions.
That is all for now, but more is on the way on this shelter.
However, I wanted to keep new information coming for the sake of the blog's viewership coming back.
Several months ago I was approached about testing out the Little Bug Out for Seek Outside and I said absolutely. After a week with it I am going to post a few pictures just for fun.
A longer blog of initial impressions is coming and hopefully some solid information on how to best use this shelter.
That is all for now, but more is on the way on this shelter.
Thursday, October 4, 2012
Season So Far
With hunting season in full swing it has gotten harder and harder to write. September 15th started my season and it has been going very well ever since. I didn't connect with the buck that I wanted to put in the freezer, but a friend did. These first two pictures are of that event.


These next pictures are from some other trips and adventures that have taken place so far. There is another trip in store today through Saturday that I hope will bring home some meat. I have a deer tag and a cow/calf tag for a very good unit. I hope to have more time, and some more good pictures.

Beetle kill is a brutal thing.


These two pictures are of my Seek Outside Medium Stove in their first generation 6 man tipi. It really is an excellent set up, and coming home to a fire makes for an awesome evening. Looking forward to many more uses.

This picture I am particularly proud of. The shooter is the younger guy and there has been a lot effort put into not just his hunting but his life in general. This was his first solo kill as his older brother and I didn't go out with him that morning, but found him and helped him pack it out. 100% his own kill, well done!
Saturday, August 11, 2012
Second Edition: Meindl Perfekts vs. Asolo Sasslongs
It's time for an update, on the Perfekt's and with the update a comparison to my strictly hiking Asolo Sasslongs. This is mostly a comparison, for comparison sake but hopefully useful all in the same for someone looking at either of these boots. This comparison is to emphazize the strengths and weaknesses of both. However, it must be noted that these are both for different purposes, but because they are on my feet they need to be compared.
The purpose in owning two pairs of mountain boots is pretty simple, one is for summer and early fall, and the other is for later fall and early winter. Both could likely be used in the spring depending on what sock and the conditions being faced.
The biggest strength that I have to give my Meindls is the footbeds. When compared to my Asolos there is a night and day comfort difference. The cork in the Perfekts make all of the difference and truthfully I will be putting them in all of my boots.
My feet are a tough task to please because I have to order a size 13, however I am just above a 12.5. To alleviate some of that problem you won't find me wearing boots without my thick wool socks, even in the middle of summer.
The Perfekt Footbeds help with this some as there is a second insert that came with the boots. This second insert added some extra padding up front on the balls of my feet and made them far more comfortable than what they were straight out of the box. This extra layer also made the boots just a little bit tighter, and therefore easier to stop blistering.
My Sasslongs by Asolo are very different in their width in comparison to the Meindls, but a very good boot fit for me. Combine this with the wool socks and the Sasslongs do quite well in fit. The Meindl's are built to be a little more heavy duty, as they probably should be based on what purposes I have for them. The Sasslongs are not as tall either, but still provide plenty of ankle support.
The construction on the Sasslongs could be improved on the method of attachment for the heel to the sole overall, but it should be plenty strong for use for summer scouting trips. They won't be beat to death nearly as much as if an actual stalk for an elk or mule deer takes place and there are numerous rockslides to get across for the shot.
The Sasslongs are more than enough for my early season scouting and summer hiking, but the Perfekt's will be going with me into the actual hunting season as the temps start to drop and I need the higher ankle support.
The Sasslongs have a full rubber rand that comes up about two inches and protects the leather well from scuffing and such. As compared to the Kenetrek rubber rand they are about half as thick, but the lower thickness provides a better overall break in time. They cover about twice as much area as what is on the Perfekts and for going through some of the thick stuff they do a little better job.
All in all both sets of boots are necessary and serve different purposes.
Saturday, July 28, 2012
Pics From Recent Travels
Here are a few pictures from the past week. One of the cool parts of my job is that I get to lead some fun trips with teenagers in the summer. Enjoy the country.


Tuesday, June 26, 2012
Current Gear List: The Shelter Blog
There are currently three big names in the Ultralight Floorless Shelter world. Kifaru, Titanium Goat, and Seek Outside. I currently own two of them and have owned all three at one point or another.
Current: Titanium Goat Vertex 5, and Seek Outside(SO) 6. The SO is the old model not the new one.
The Vertex 5 has been reviewed here at a surface level, and will be further later after a few more field uses. It will be exactly what I was looking for in a solo/duo shelter.
The SO 6 is a great addition to the family, and will be what my wife and I use on our excursions to the back-country and the not so back-country. I have set it up three times now and there is more than enough space for 2-3 people and a LOT of gear. It would even be possible to fit 4 and SOME gear, but not nearly as much, especially if used with a packable wood burning stove.
In comparing the TiGoat to the SO I would say they both have some different qualities worth noting. First the TiGoat is a much more basic shelter, but functions well for what it is. All of the tie outs are double stitched and the cordura is round in shape. The SO uses a triangular shape that has singular stitching on the cordura, but is doubled on the actual attachment point for the loops. Having not tested them both in extreme conditions yet... there isn't really an edge to give to either, just note that they are different.
The SO has more features internally such as the sod skirt which will be nice, and can easily be used with a nest that has internal guy out points. The new models will have different levels of what features you can buy to say customize it to a singular person's needs. The stove jack came installed, and the only thing left to do is buy the actual stove. The TiGoat needs to be sent in to have the stove jack installed.
Past: Kifaru Paratarp/Annex- The problem was that it was just too small for me even as a solo shelter. I ended up selling it because it was not going to serve the purpose that I intended for it. I will be honest, the tie outs didn't seem to have as much thought as what my TiGoat and SO both have. Maybe I am comparing apples to oranges here based on relative sizes of the shelters, but it just felt like there was potential for issues with the Paratarp.
The pros to the entire package was how small and packable it was, the ability to make it cooler during warm weather conditions by not bringing the annex, and the ability to use trekking poles to put it up.
I suppose, if necessary you could get two guys in there, if you had to and wanted to be really crowded. For me it just wasn't going to cut it. Hence the sale and purchase of the TiGoat Vertex 5. The Vertex 5 will still be close quarters with two guys, but not nearly as close as just one.
Update: After one trip with the SO Six, I can say that I am very pleased. It endured some solid wind conditions, and was easy to set up as well. I am looking forward to several more trips with it in the coming month.
Tuesday, June 19, 2012
First Lite Springer Vest and Chama Review
The past two weekends have given me an opportunity to get some serious time in the First Lite Chama and Springer.
To say I am pleased with their performance would be an understatement. In fact it was warm enough with the Chama alone about halfway up the hill. The Springer vest is a little thicker and was put in the pack to make the hike in a little more comfortable.
Both of these layers will be worn in conjunction with a Kuiu Guide Jacket as an outer layer. Rain gear has yet to be determined for this season, but it will likely be something from a clearance rack somewhere.
The seams look to be very strong, and they fit me well as a tall guy. Neither article of clothing bunches up at the belt line, or where the pack makes contact with the hips. This has been an issue in the past with other pieces of clothing.
I should have more to say after a short trip this weekend with this gear. In the initial use they have functioned well, and by the end of the summer/fall I will have much more to say in regard to this clothing.
Friday, June 1, 2012
Do I Really Need it?
I am a full time youth pastor and find myself at home before the start of one of the busiest weekends of the year in my profession: Graduation. This year I will be losing a quite a few of my regular students as they head off to college to continue their education.
During this short down time I have become very distracted by a set of boots. Kenetrek Mountain Extreme 400's on sale at Sierra Trading Post. I have elevated the Kenetrek brand in my mind quite a bit and am really having a hard time not pulling the trigger.
The biggest reason that i can't justify the purchase is that last season I spent a $260 on a pair of Meindl Perfekts that I absolutely love. I pulled them out of the gear closet last night and even wore them a while to remind myself of just how well they fit.
For the moment I have talked myself out of buying them and likely won't look again unless there is simply an amazing deal that shows itself.
The point of this blog is to search through and ask the question of whether or not we really need it. The Kenetreks would be fun after the break in period and would be immensely enjoyed. However, the $250ish that I would spend on them could be placed in other gear that would be a little more relevant.
Part of the draw of the boots is that feet must be treated well in the backcountry, and are therefore a priority. So, how do I go about prioritizing my gear purchases every year?
1. How often will I use it.
2. Comfort
3. Weight
4. Effectiveness for the job
5. Price
So, all those factors in mind, several things need to come before any more cash is dropped on another set of boots. First, a shelter that will be more comfortable for the Mrs. and I. At the moment it looks to be a BCS from Seek Outside. Second, a new spotter. The jury is still out on what will come home, but it needs to be a significant upgrade from the current set up. The Leupold Sequoia has served me well, but needs to be moved to the land of spares in the closet. Third, is a Duplex Timberline 3 from Kifaru for back packing.
All in all the priorities will win out for another day, would love to hear how others prioritize gear purchases.
Thursday, May 24, 2012
Updated: The Lady's Take: Kenetrek Mountain Extreme Hikers
So I recently cam across a deal to acquire some high quality hiking boots for my wife in the form of Kenetrek Mountain Extreme Hikers. She is new to the west, backpacking, and really anything in the outdoors. Advice has been given, and heeded that if I am going to successfully have her come on these outings it will be necessary for her to have quality gear from the start.
The boots seem to fit her feet well and after Monday I will have some more to add to this post regarding her thoughts on the overall fit/comfort of the boot. We will be heading north and trying to get a little bit of fishing and hiking in.
Some things I notice right away that caught my attention compared to both pairs of my Meindl's is that Kenetrek sends wax with the boots. Very easy to take care of the product that way and my investment.
Because the wax came with the boot it took about 10 minutes for them to have their first coat. The loops for the laces are much better than the Meindls in design and function. They are easily moved for application, and twist to be able to get all of the leather the necessary life preservation.
The quality seems to be very high. There is nothing on these boots to suggest that every inch wasn't thought out and planned. If this is true then the boot should live up to the hype that has been passed onto it for so long.
The tongues are very different. Kenetrek seems to leave a much smaller space for getting the foot in as the cost for better ankle support. It wasn't tough for her to get them on, but it took more effort than my Perfekt's or Alaska Hikers take.
Pictures will be posted as well, enjoy the Memorial Day weekend!
Update:
The verdict is not completely out, but it seems these boots do not fit her feet well. The heel cup seems to slip is the laces aren't tight enough, and if they are too tight she has circulation issues.
Now, it must be stated that this has nothing to do with the boots themselves, it is simply that her feet do not do the standard width well. We are going to try a mens 7 and see how they work based on the extra width she can get from a boot like that.
Wednesday, May 16, 2012
Gear List-The Current Clothing
This is a constant piece of work to keep this portion of the hunting gear up to date. It is also the easiest portion to keep up to date, as well as finding great deals. Clothing gets updated every year and its very easy find close outs on the previous year, or two year old model. This is an area that I don't feel like the newest model is necessarily best, but rather comes down to function and fit. Some great deals can be had at High Mountain Outfitters websites, my transactions with them have been top notch.
Current: Kuiu Attack Pants, Sitka Core Baselayer, First Lite Chama and Springer Vest. All of these pieces are new this season, so there really isn't much to talk about in terms of evaluation. After this fall and the proper use a full scale review will be done.
My initial impression of the Kuiu Attack pants is very positive, and they are extremely comfortable. The gusset in the crotch is very important for someone above 6'2" like I am.
Intial impressions on the First Lite tops has been positive as well and time will tell. The Merino make is already winning favor as opposed to the Sitka Core base layer.
After a few trips with these pieces there will be much more in depth discussion, but that is all for now.
Previous:
The last two seasons a set of Kings Desert Shadow has been doing it's best to keep me concealed. In the clothing duffel there is on 36T pant, one polyester shirt, one breathable shirt, and a polyester hoodie.
For a guy who is 6'5" it's tough to find a set of normal pants that fits well, let alone a set that is dedicated to hunting. These pants are tall enough, and fit well, but don't have the gusset like the Kuiu, and it would be a major improvement.
Their 100% polyester make was strong enough for the abuse that they were subjected to, and they dried out very quickly. They did show some wear in the usual spots around the heel and sides of the feet where normal rubs and wear happen.
The only complaint in my mind is that they fit more like a jean rather than a pant that is dedicated to the back country like Kuiu. Would I recommend them, yes. Would I buy them again, well no. Not because of quality, but because I am sure I could find a little more comfortable fit.
My Desert Shadow Full Zip Pro Hunter has been great as a layer piece and I would buy this one again if I found it on the clearance rack. It has kept me warm on many occasions and will likely do so again in the future. One night it even kept me warm next to a fire when the situation called for us to stay at the kill site all night long. We slept close to the fire, but it did the job.
The Long Sleeve Kings Shirts also did well, but there likely won't be any additions of this piece to the gear closet in the future either.
I like the pattern itself, but will be buying it on ApXG2 if I do, not on the Kings name brand stuff.
Friday, April 27, 2012
The Current Gear List: Part 1
This blog will simply be all of the pieces of equipment that make it into the back country with me and the pieces that I intend to buy in the near future. Some has been well tested and some has not. There will also be a section what has been used in the past.
It will truthfully take several writing sessions to get all of the equipment that ends up in the pack for a trip to the back-country. So bear with me as I add pieces and pictures.
I would also love to hear what pieces of equipment are worth trying. If there any questions on any particular item feel free to ask.
Current Pack:
Kifaru Longhunter Guide on an EMR frame.
Mystery Ranch Daypack Lid
Kifaru Cargo Panel
Kifaru E&E
2 Medium pods
Molle Express will serve as day pack when necessary.
Past:
Badlands 2800-Used for 2 seasons and broke it twice.
Black's Creek Mossback Bounty Hunter-Wasn't tall enough for me but was capable of carrying plenty of weight. 135lbs was the heaviest I ever did.
Future:
Kifaru Duplex Timberline 3 bag
Footwear:
Cabela's Meindl Perfekt 400 gram insulation-For the cold hunts.
Cabela's Meindl Alaska Hunter uninsulated-For the not so cold hunts and summer backpacking trips.
Past:
Danner Pronghorn 1000 gram- Loved these boots, but love can't repair leather.
Future:
Hanwags, Kenetrek
Shelter:
Titanium Goat Vertex 5
Past:
Ledge Recluse-Shelter that served me well, especially in the summer. Cold weather required an upgrade.
I have also used just about every other brand of relatively cheap tent out there.
Future:
Seek Outside Back Country Shelter(Ended up with a SO 6)
Monday, April 23, 2012
Running Review: Cabela's Meindl Perfekt Boots
Last season, it finally happened, the faithful Danner Pronghorns of many years gave up the ghost. They helped me conquer many trails, and probably some that were a little rougher than I could handle. I bought the first pair in 2005, and replaced them once.


I have never had a pair of boots fit as well as this pair has, and it was going to take some work to find something that fit the bill.
In the years since this model of boot was first purchased some changes had been made even though the Pronghorn classic is still around. I didn't feel like the changes that had been made to the boot were what was going to do the trick anymore. When fitting them the heel cup wasn't comfortable, and the width just wasn't what I was looking for.
To be 100% honest the largest constraint on which boots I would buy was what my budget would allow. Under $300.00 was my starting point and I soon discovered that the chosen dollar figure would provide a limited but solid choice for the money.
A friend of mine had been using Meindl boots from Cabelas for a while and the recommend was positive. The Perfekt model ended up in the shopping cart and on the way to my door.
Whenever new gear arrives on the front porch my behavior tends to change and its very similar to a small child at Christmas. This piece of gear was no different and they were soon out of the box under thorough examination.
Please bear in mind as you read that the pictures of the boots are now from a season of use. If you are wanting an indicator of how well the boots held up, this is your thread. These boots likely saw close to 100 miles this past hunting seasons in terrain from rock-slides to open fields and everything in between.
First impressions were good, and the initial walk around the neighborhood was also a strong indicator that a replacement had been found. The comfort level I desired was there, as well as a proper fit.

One thing that must be noted is that I am a size 13 in boots, and at this size the particular model I purchased comes with a different sole and rand. My model actually has a 1 inch rubber rand to protect the sides of the boot. For reference the boots are probably very similar to what Meindl Canada models look like. Personally I felt like it was an improvement as it would protect the toe and heel areas from my clutsy nature. I tend to trip over my own feet on a fairly regular basis.

Next, up was the waterproofing process. Olbenauf's was shown in the video on the Cabelas website and had made its way home from the local work wear store. Per the prescription from the website the wax was applied and it aided in the break in process. The wax and boots performed very well in wet to very wet conditions. On their first outing rain poured for the last 2.5 hours of the trip and the boots never leaked. When I woke that first morning the water that had been on the outside of the toes had frozen, but the interior was still dry other than normal foot sweat.
There are two complaints that can be made in my mind for the first piece of a running review: the lace loops and not enough give in a couple of spots on the foot-bed.
First the loops. My buddy bought Kenetrek boots this year and a very cool feature is their flip up style lace loops. This style allows wax to get underneath and all around the areas on the leather that has been punctured essentially breathing life into them for a longer period of time. Meindl does not employ this type of system but would be wise to do so. If enough wax does not make around this area on the leather, eventually I could be pulling my laces tight and the leather could break. Keep in mind that it would require a lot of hard use, and very little conditioning for this to happen.

You can see from the picture that I have purposely rubbed plenty of wax around the loops to make sure that the necessary oils make it into the proper areas.
The Perfekt foot-beds are often bragged about, but my experience with them held a little to be desired. I am going to upgrade before this fall to some Lathrop and Sons custom foot-beds to up the the comfort level. The Perfekt's beds weren't bad by any stretch, but with the way God designed me there tends to be a hard spot on the balls of feet.
After one full season in these boots and number two well on it's way expect more updates. Hope you enjoyed the read.
Thursday, April 12, 2012
Striking the Balance
I recently spent a couple weeks in Africa and honestly loved just about every minute of it. I wasn't there for hunting as what this blog has been purposed for, but I was there to spend time with Orphans. Some of my hunting gear came along, in fact it was a testing ground for much of the new stuff that had been acquired.
The Molle Express from Kifaru was my carry on of choice and it served that purpose well. We met our Visiting Orphans team in DC after a flight out from Salt Lake City before making the 14 hour flight the next day Addis Abeba, Ethiopia. Our luggage had been checked all of the way to Rwanda and wouldn't do us much good at the airport. So the Mollex was loaded up with my computer, clothes for 2 days, all the pertinent paperwork, and books as well as toiletries and legal first aid.
It must also be mentioned that to fit all of this in a Mollex it was necessary to attach an E&E and Claymore pouch. Inside for organization purposes the clothing material was stuffed in a medium pod. This proved to be more than enough space and to make the bag fit the necessary requirements for carry on cinching down was not a problem.
The flights and lay overs all went smoothly, and the gear performed exactly as planned. First Aid as well as all of the stuff that was necessary to come along to all of the places we were spending time with Orphans made in intact. With Nite Ize clips my bag stayed in relative security from pick pockets and truthfully I don't know if it every was challenged in that regard.
The plan is for this piece of gear to serve as an Every Day Carry for computer and such, and also function as my carry on for future trips. I went a little more expensive because I knew Kifaru could handle the abuse and if it didn't they would do their best to fix it as soon as i got it to them.
The balance that this blog is about is, "How do I find that balance of where I would like to spend my money and where it can go to make a difference in the lives of those who can't speak for themselves?" The book of James has challenged me on many occasions with these principles and I am finding that honestly I am going to have to do some extra work to support my habits as well as areas that I have been challenged to minister in.
My future bride and I have also talked about the possibility of adoption. We don't know if it will be foreign adoption or here in the United States but regardless expensive. There are ways of fundraising for these things and it is very likely that they will be employed when its time. Regardless of that fact we live in relative certainty that we may have to give up some creature comforts to be a part of these children's lives. For me this may mean some new gear will be foregone.
A young man at an Orphanage called Noel in Gisenyi Rwanda particularly challenged me. He has dreams far beyond what society seems to have dealt him as an orphan and a desire to move beyond that title. He recently talked to me on Facebook asking if I could possibly send him some automotive manuals. His desire is to someday be a mechanic and has been given the opportunity to study that trade.
A simple sacrifice in my life of a little extra time spent working could make the difference in one person's life for the entirety of their career. I currently have been given some PDF journals that could be on their way to him in May detailing auto mechanics but if that won't work I will need to spend $50.00 or so to send him some books. Fifty dollars is what it would cost me roughly to fund a couple of small pieces of gear for new Kifaru stuff.
A little sacrifice on my part and I will be able to make a difference in the lives of people who will not be able to help themselves. Sometimes my gear is going to have to wait, or take a little bit more saving before it can come home.
The reality is though, the lives of people matter. No matter what I refuse to miss the sanctity of life and will do my best to find a balance between needs, wants, and sacrifices I can make for voices that cannot be heard.
Tuesday, April 10, 2012
2011 Mulie: Part 3
Easter season in the life of a youth minister often comes with the cost of much time spent in preparation for services and events surround The Lord's Day. Now I have several weeks before my next major event and hope to finally get this story finished.
Sleep that night came surprisingly easy for a night that normally doesn't allow for much. The pad was more comfortable than normal and the sleeping bag warm enough to help sleep come when a 5 mile hike and 3000 feet of elevation have been climbed.
The alarm went off as was planned but there was noise above our tent from a group of hunters who had camped about a 1000 feet below us and decided the trek up the side of the hill was worth it in the dark. We quickly continued finished getting ready and hurried out of the door hoping that the deer we had found the night before hadn't been spotted by the other hunters.
In an attempt to keep our shapes from being spotted on the horizon we stayed behind a group of trees and quickly got our spotting scopes set up. We found several deer quickly but disappointment quickly set in when we didn't find the buck from the night before. It only got worse as we heard shots come from the direction the other hunters had gone and it was easily conceivable that the buck we had found had found their crosshairs.
After several minutes sitting in the cold and hoping our buck wasn't the one they had killed the grey ghost I had found the night before stepped out from the trees. He met the standards I had set earlier in the summer and a stalk wasn't even necessary because he was under 300 yards and standing broadside.
My desire now is to make up some story and say that I hit him with the first shot but I didn't, it was a miss. At which point he took off and left me scratching my head on what I did wrong. We decided our best bet was to head down and make sure it was a clean miss and slowly head the same direction that he went.
There was no blood as we had expected and pursuit was tough on the frozen ground after the rain the day before. Tracks were tough to discern but soon we spotted him and his partner working their way up the next drainage about 250 yards away. I also wish I could say this shot was clean as well, but with his quartering angle I hit him a further back than I would have preferred. He headed down the hill and settled beneath a large pine, but far enough away that I couldn't finish him.
We worked our way closer and I finished the job that should have been done with the first shot. To date he is my best mule deer and I hope to continue to improve and get better with every season. This hunt will be tough to top, but in the three days we stayed in mountains after my kill 3 deer that were much larger were located. There is hope for next season.......
Friday, March 30, 2012
Cutting Weight- The Journey Here
I am taking a break from the mule deer story to talk about my trip in general to become a more efficient backpacker. It's a learning process to say the least, and there are constantly new things to be taken in. My hope is that I never get to the point where I feel like I don't have things to learn. If I ever get to that point perhaps its time to hang up the boots and take up something else.
The trails that have been traveled since my first trip at 10 years old have provided me with experience, and the lessons learned have made me want the backcountry more and more. I had a 40lb pack frame that was a borrowed from a local pawn shop that trip, colored in bright orange. For 1994 it may not have been bad, but the memory even then was that it wasn't the most comfortable thing to wear.
Life has constantly been intertwined with my faith, and life in the church. This trip was a youth group trip that my Dad was leading, and even though I was too young, Dad snuck me along. Every person was loaded to the hilt with different cans of soup, water and other things that I simply look at and laugh now. Even with the heavy load my bright orange pack was the first to arrive at our designated lake,
Several youth group trips later and I was the proud owner of my first Kelty frame pack when Santa proved to be very generous. It was a sweet pack in my mind and served it's purpose very well all the way until I graduated from High School. The Blue bag on the frame was removed several times and different variations were tried to make it more efficient. In the end the pack proved capable, and kept me wanting to pack in farther and farther.
College proved to be a time where my hunting and backpacking were limited because lets face it, central Texas is not a great place to pursue those things. Breaks from school were spent fishing in my home state, but often they fell on times of year when packing in wasn't an option and the resources for winter camping weren't there. I read Mike Eastman's and David Long's books to pass some of those breaks, and it kept the motivation factor high.
Two trips in college home during Elk season proved to not be enough to satisfy the desire to be in the woods and graduation found me loaded and ready to be back in the Mountain West. My first home after college was within a couple of hours of the mountains again and it was on.
One major problem, the stuff I was carrying in weighed too much, and again proved I had much to learn. For this to change several mentalities needed to change. The first and most important would be the perception of what is necessary to take on a backpack hunt. The next is that heavy duty, i.e. heavy was always the best way to go. I wasn't aware that there is such as thing as well built light stuff
A major culprit of excess weight was the Black's Creek Bounty Hunter, Mossback edition. The pack was purchased fairly impulsively in 2007 to really start staying in for long periods of time. I proudly brought all 12lbs of it home and started to put together all of the stuff I would need for the coming trip. The pack seemed heavy duty and would eventually bring mentality number one to the forefront.
The first season consisted of packing in simply a tarp and my down sleeping bag for shelter and I suppose it worked ok. Early season archery it wasn't bad, but because it never got terribly cold I was never miserable without a pad. It is somewhat amazing to me that I was never more miserable than I was, it honestly could have been worse. I had the weight idea right in this "system," but comfort was not of much value. Minimalist, yes, comfortable no.
By 2009 an Alps Mountaineering pad had found its way into my supply and I dug up an old tent from my parents shed. Dad has a habit of buying every tent he sees when he goes to garage sales and it played into my favor. The first tent was not that heavy, and truthfully served me well for a two seasons, but I needed an upgrade. Ledge Recluse was an upgrade for a season but was still not as efficient for the later elk hunts that I typically go on.
Another area that needed an upgrade was the food department. MRE's just don't cut it anymore. Number one they are just plain too heavy. Number two they are just not very good. There are tricks out there to make them better, but truthfully it's still not very good. Mountain Houses have become a staple of my back-country cuisine and will be for many years to come. An even better upgrade that I am working through recipes is making my own freeze dried food, I am hoping the wife will like me using her kitchen for such adventures....
The Black's Creek needed to go, first and foremost it didn't fit correctly. Next comes the whopping 12lbs that are carried in the pack alone. An upgrade to a Kifaru Longhunter Guide has now been completed and the pack weight has been cut in half, and the pack is big enough to produce shoulder lift. Did I mention that it's fit is actually comfortable?
The pad has now been upgraded to a NeoAir by Thermarest and I can't complain in the least bit. This season will prove it out as a viable pad and the hope is that many comfortable nights will be spent on it.
A TiGoat Vertex 5 now comes with me on solo and double trips and will serve that purpose quite well I believe. Plenty of space for one, a little tight for 2, but doable, all in all a solid upgrade for a reasonable price.
More upgrades are coming, and this blog will be the place that I put my thoughts down on the value of each piece of equipment.
Monday, March 26, 2012
2011 Mulie: Part 2
The month before was spent looking over maps and finishing plans for where exactly opening day would be spent. This was an early season hunt and the hardest part would be some of the competition from other hunters. We only saw one other hunter on the way in during the scouting trip but saw a pack train on the way out. This was discouraging in one way but encouraging in another that bad areas don't usually get hunted. The country held deer, we knew it, but apparently many others did as well.
Preparation came and went, and it was time for the real pack in. Rifles sighted in, packs ready, counting ounces, going over the list, making sure everything functions perfectly. All the little things that are necessary before boots can even touch the ground. This in and of itself can be a daunting process, but helps take the mind off of the the wait for the hunt.
The little traveled road we had come in on a month before seemed to have a camp at just about every possible corner. My heart sank knowing that the pressure on the deer would soon force them into the holes that were much harder to find and chances would be tougher to come by. So goes hunting.
As we left what felt like a parking lot the day before the opener our spirits had sank quite a bit. It shouldn't have surprised us though, with modern technology and the availability of maps that it is quite a bit easier to find a good spot than it was 20 years ago.
When we left the relatively flat river bottom to our planned spot the weather turned for the worst and the typical evening shower that so often hits the high country came. This forced us to stop and put on the rain gear and it was time to fill up the extra water bladders. This extra water would get us through the evening and the final ascent up the last 1000 feet in elevation.
The start of that ascent brough the surprise that we had not only found a group of other hunters, but also stumbled on some deer they intended to put a stalk on in the morning. One of the deer was easily one of the biggest spotted the entire trip. We never saw that deer again.
This ascent proved to be the toughest part of our hike and being soaked did not help in the least. This section of real estate cliffs out in every area but one. The only saddle in the entire area proved to be where we crested the hill and would even make camp.
My partner had started to feel sick on the way up, and it was likely due to dehydration. Camp, a mountain house, warm sleeping bag some heat from the stove were a welcome relief for him. I on the other hand was ready to look over the area and see what I could from our vantage point.
Much to my surpise, 300 yards below camp was a buck that met my standards. I couldn't believe that I had been able to find one that easily, in an area that we couldn't see any other people camped. Travis soon left the comforts of camp to look at the buck with me and see what had me so excited.
After about a half hour of looking over a few more bucks that had made their presence known, we both decided that it was time for bed. I spread my pad and sleeping bag out thinking it was pretty pointless considering how little sleeping would actually be done. The reality was that I was pretty tired and it was time to get some rest, and I would have to leave the buck where he bedded down until the morning anyway.
Saturday, March 24, 2012
2011's High Country Mulie: Part 1
The story behind my buck from this past season actually starts on September 26th 2010. Dad, Justin, and myself had decided to try a new area for a pack in trip for elk. Until that moment I ate, slept, and breathed with the sound of elk bugles in the fall, bow in hand.
2010 had been a particularly frustrating season in pursuit of the wapiti. Blown stalk, after blown stalk. Wind change after wind change. Not filling my cow tag because in the rain I had put my rangefinder in my pocket, and was too noisy to get out 20 yards from the elk. I guessed 30, and you guessed it, right over her back. Entering the pack in, there was hope for a change of luck, but it came in the form of grey ghosts of the high country.
The evening of the 26th didn't produce any monster bulls, but it put me in some new country that held some good deer. No elk were in store with a bow that year but much had been learned, including where I would be spending some time chasing Mulies when it opened the first week of October.
On the 6th of October I found myself back in the same country, solo, with a rifle. The back story is that two of my hunting partners had killed really good deer and I was just a little bit jealous. Ok, really jealous.
The problem with this section of the back country is that the prime-time deer areas offer no real place to glass them before you are right on top of them and need to be ready to shoot. There isn't much time for real observation of the deer, just an ok he's big enough moment. I didn't want ground shrinkage, but the situation dictated that it was likely.
To make observation of deer even harder 6 inches of snow poured in on the first night as I slept in the truck at the trail head. Hiking the 2.5 miles that morning in the residual fog from the snow fall, there couldn't have been harder conditions. I blew two chances at bucks that I estimated to be over 160 B&C.
Frustration set in as I set up camp and the snow continued to fall. Two blown chances at what would have been far and away my best deer to date. A new challenge was starting, and I wanted a big deer. I wanted better than what I had ever put on the ground before.
I never got to really leave that tent as the snow kept falling and the hunt slipped away, but I had my map and a plan for 2011 started taking shape. 5 separate locations started to take shape as places that could eliminate a few of the challenges that I had encountered that season.
All of them had limited access from trails, and weren't on the beaten paths. All of them offered places where glassing was possible for long distances, and they were different than the elk country I was used to. They were higher, and often more rugged. They all offered feeding areas that bucks prefer as well as places to bed.
The end of Summer 2011 brought about scouting season and several pack ins to the area my buddy and I had determined to be the best. This hunting buddy is somewhat of a pro in my mind when it comes to big mule deer. He has several on his wall that many would consider top notch trophies, and learned from some of the best in our area. This was a chance to learn more, and a chance to grow as a deer hunter.
We quickly found that our area had some of the best hunting we could ask for. 2 days of glassing had produced several shooter bucks by my standards. All I had left was the wait.
Friday, March 23, 2012
TiGoat Vertex 5: Running Review
For this coming hunting season I have made some necessary
upgrades to the gear set. My Ledge
Recluse tent that I was given two Christmases ago was nice, but had a major
problem in cold weather. It liked to
let the wind in from the bottom, and wasn't nearly as tough as it needed to be to stand up to
the elements I intend to throw at my shelter.

After doing some research, I settled on the floorless tipi
style shelter. I don't think I am done
buying this style as I am going to need a bigger model than this 5, but that
will be another blog.
My first attempt at meeting my solo/double shelter needs was
the Paratarp from Kifaru. I am sure
some of you are giggling a little bit reading that I thought I could do double
anything with the Para, but the measurements suggested I could when I bought
one off of the Kifaru Forums. One set
up and it was pretty clear that it would have been a great shelter for solo
trips, but it did not suit the dual purpose role.
I had looked at TiGoat before, and they were on the short
list when a good deal came up for a Vertex 5, I jumped on it. I hadn't found any negative reviews on it,
but it doesn't appear they have the popularity of the Kifaru shelters.
My plan then for this blog is to do a running review
through this summer into the fall for hunting season. Today will be the first installment of likely many to come.
I set up the 5 in the yard today and am very happy with what
I see. The instructions for set up were detailed enough, and accurate. You start
by staking down both loops at the door, and then the back loop. Then the rear loop is staked down by
stretching the 5 all the way across, then coming back roughly 2 feet from that
point. Then you stake out the opposite
direction tightly getting it set up as a square on the ground.


The pole comes next, and I would highly suggest using a legitimate pole
and not trekking poles. You will see in
the photos that this is a pretty tall shelter as compared to others that
utilize trekking poles. Tying two poles
together just isn't going to cut it in some of the wind that we experience
above 10k feet.

Also of note here is that I am not using the pole from TiGoat. I am using the telescoping model from Seek Outside, and so far I haven't found any weakness. The plan at the moment is a BCS next from the same company, so to save some cash later I bought the correct pole now, as it will work for both shelters. When I buy the BCS this should cut roughly $140 off of the purchase price when placing the order, and it saved me $75.00 from TiGoat. So roughly a $65.00 savings overall when you take the $75 from the $140. I will do a write up on my plan for all 3 shelters I want soon, and look forward to comments.
Back to the TiGoat. The install of the pole itself is pretty self explanatory,
open the door, lift up the center of the tipi, put in the pole, adjust the pole to get the correct height. You will want to get it fairly tight, but not too tight. I suppose this is that perfect pitch that everyone talks about with other tipis.

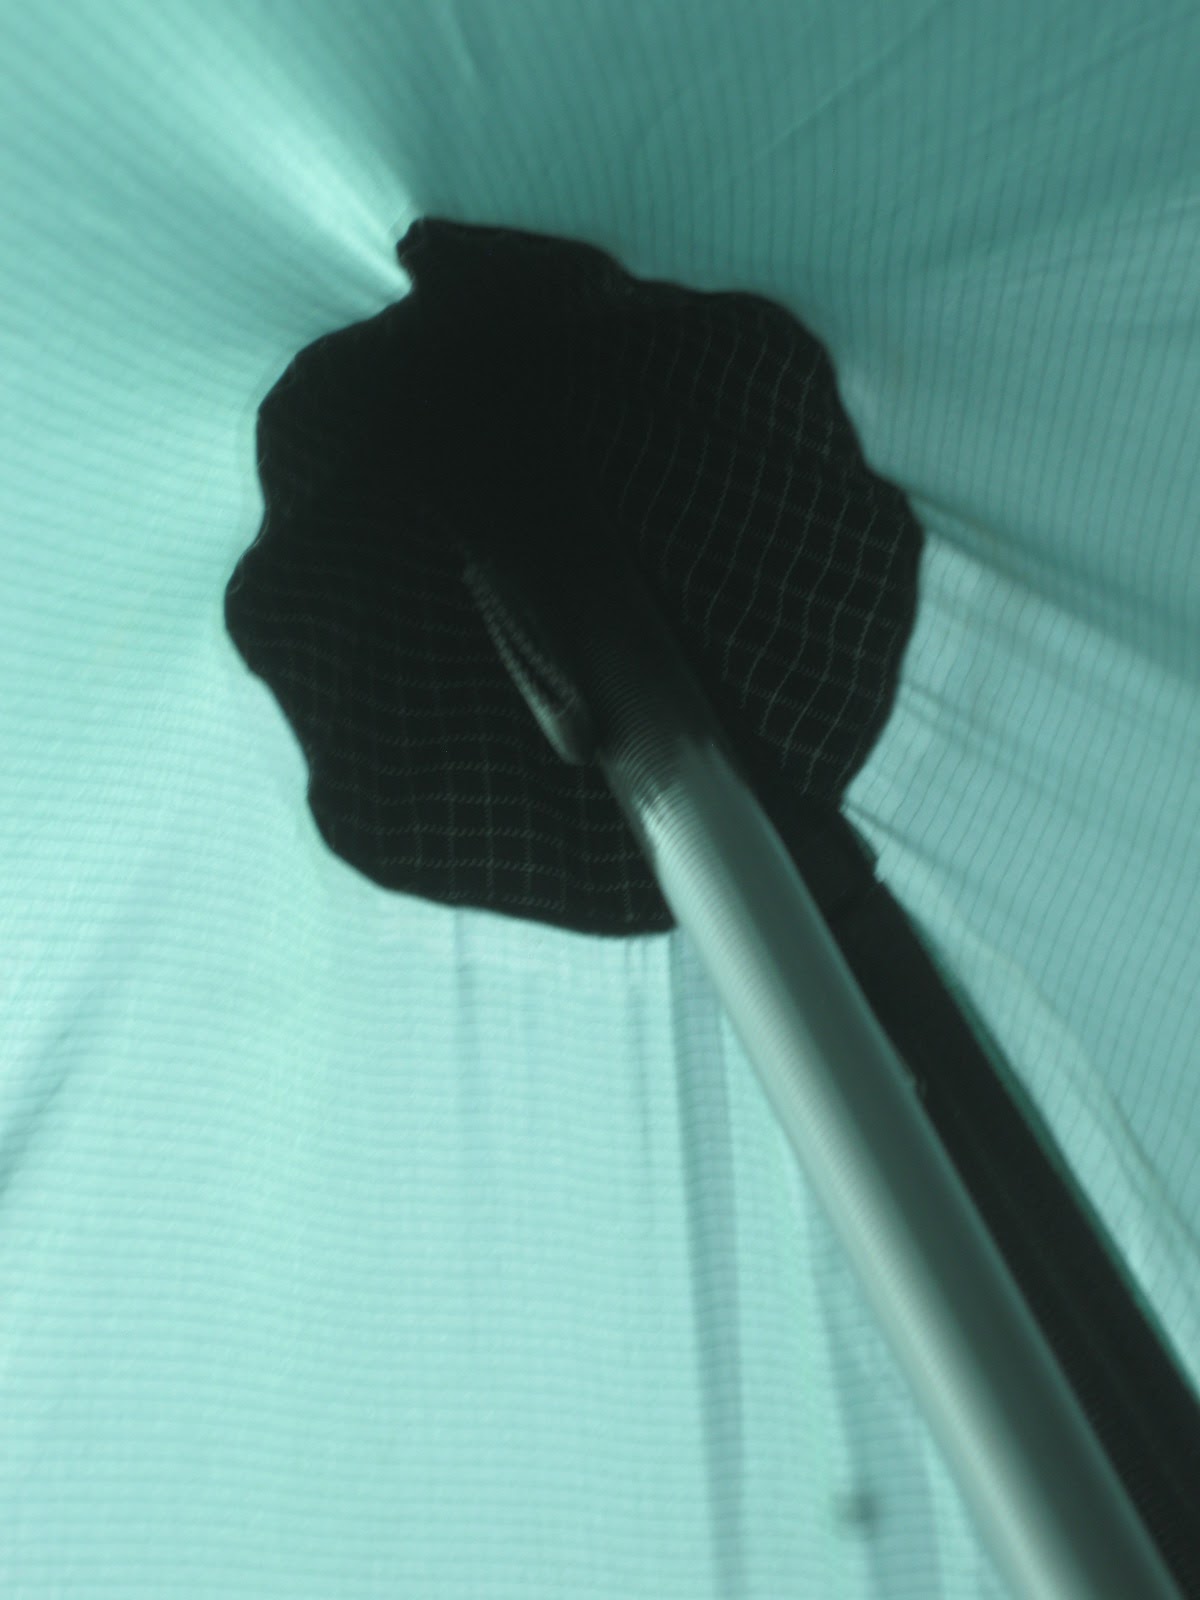

After that you simply pull the remaining stake out points to the desired spot. This takes some practice to get it right, but is fairly easily done. After a couple rounds with the Vertex 5 my preferences is that all of the tent appear as smooth as possible.
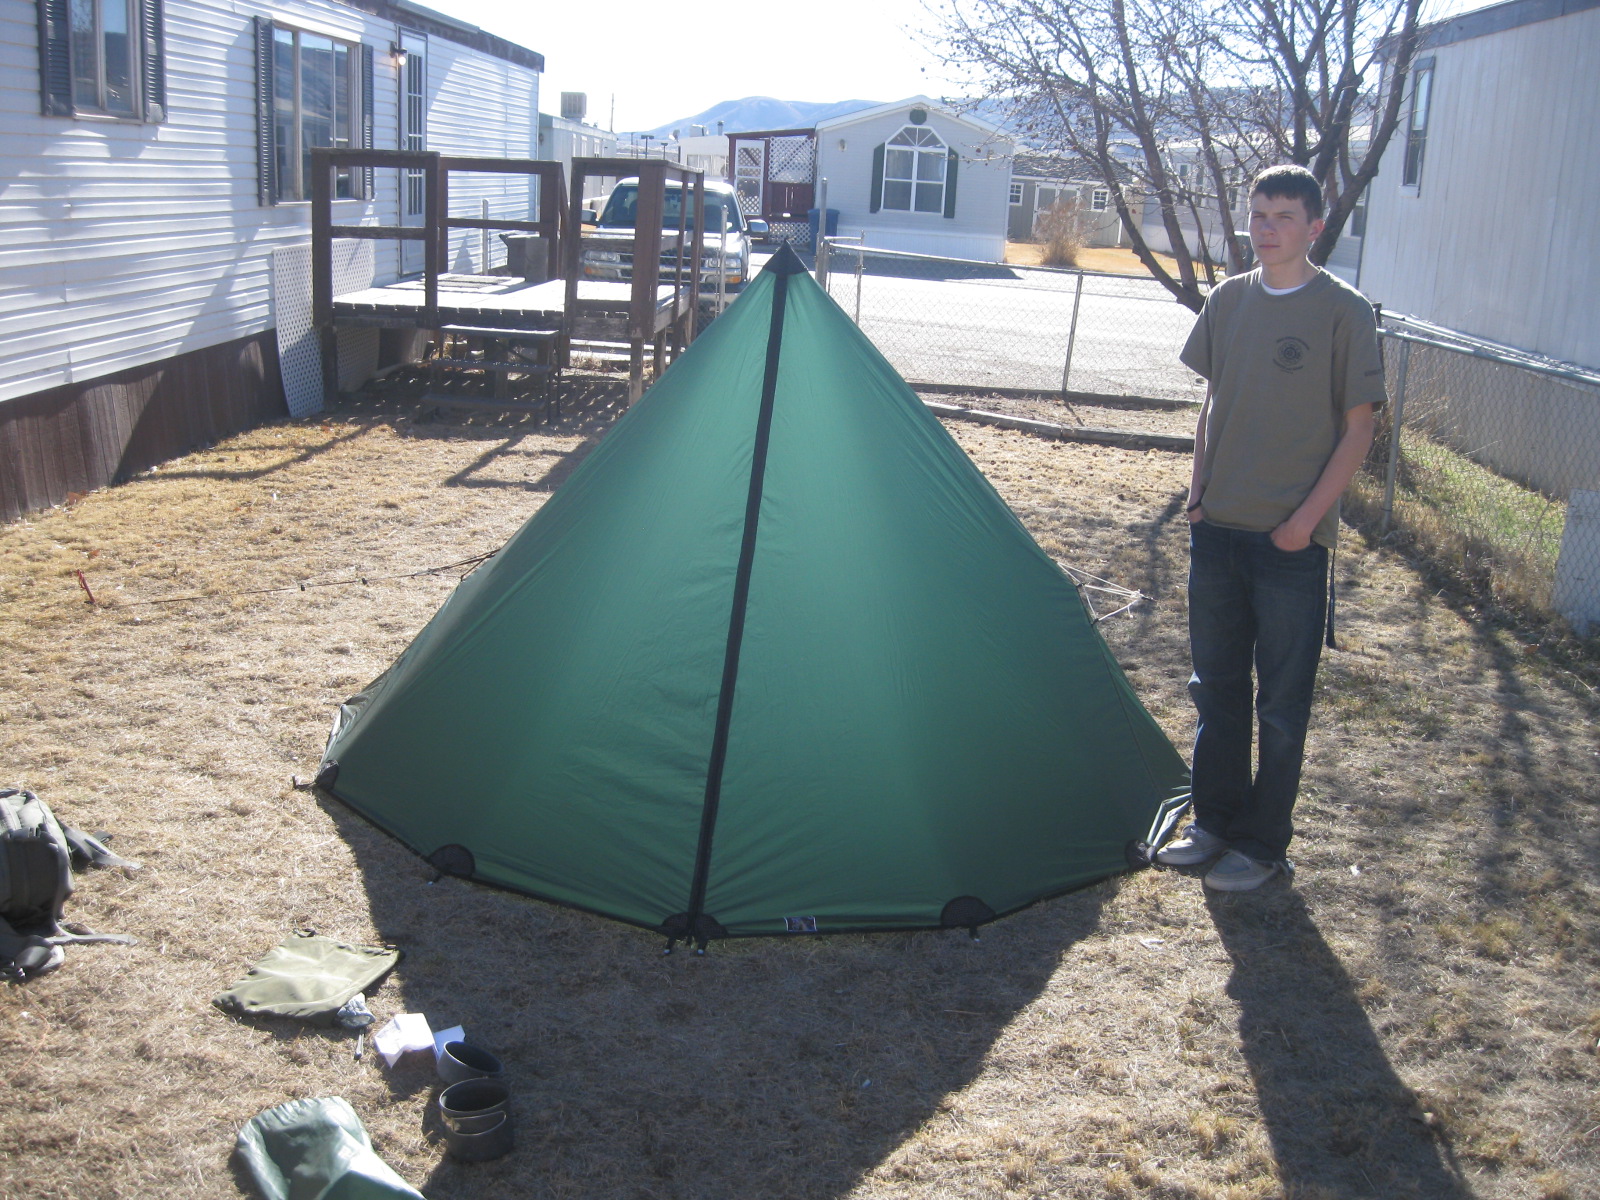

The side guy outs are a unique set up, but effective. They are 3 loops along the main seam, which you run 1/4 inch tubing with loops sewn in the ends to create 3 larger loops. On these you hook up a set up of 2 plastic hooks and simply hook them to all three loop points, and pull it tight.
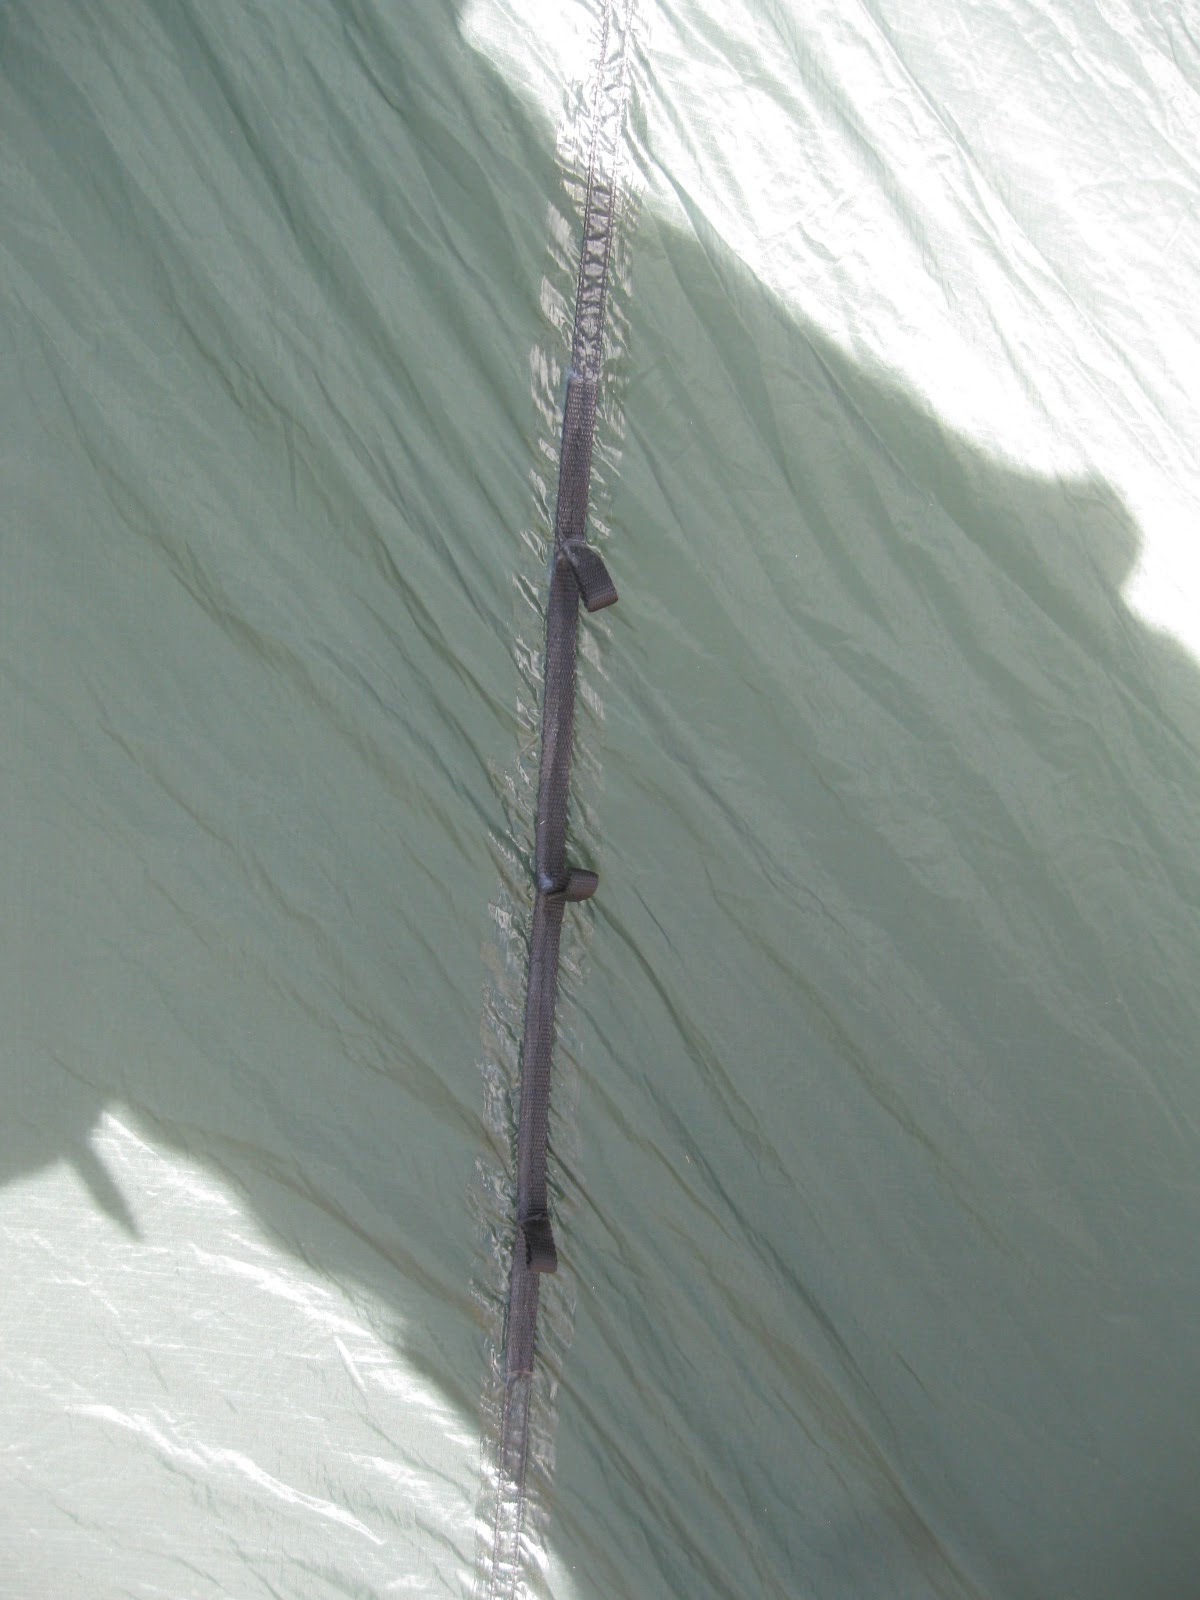
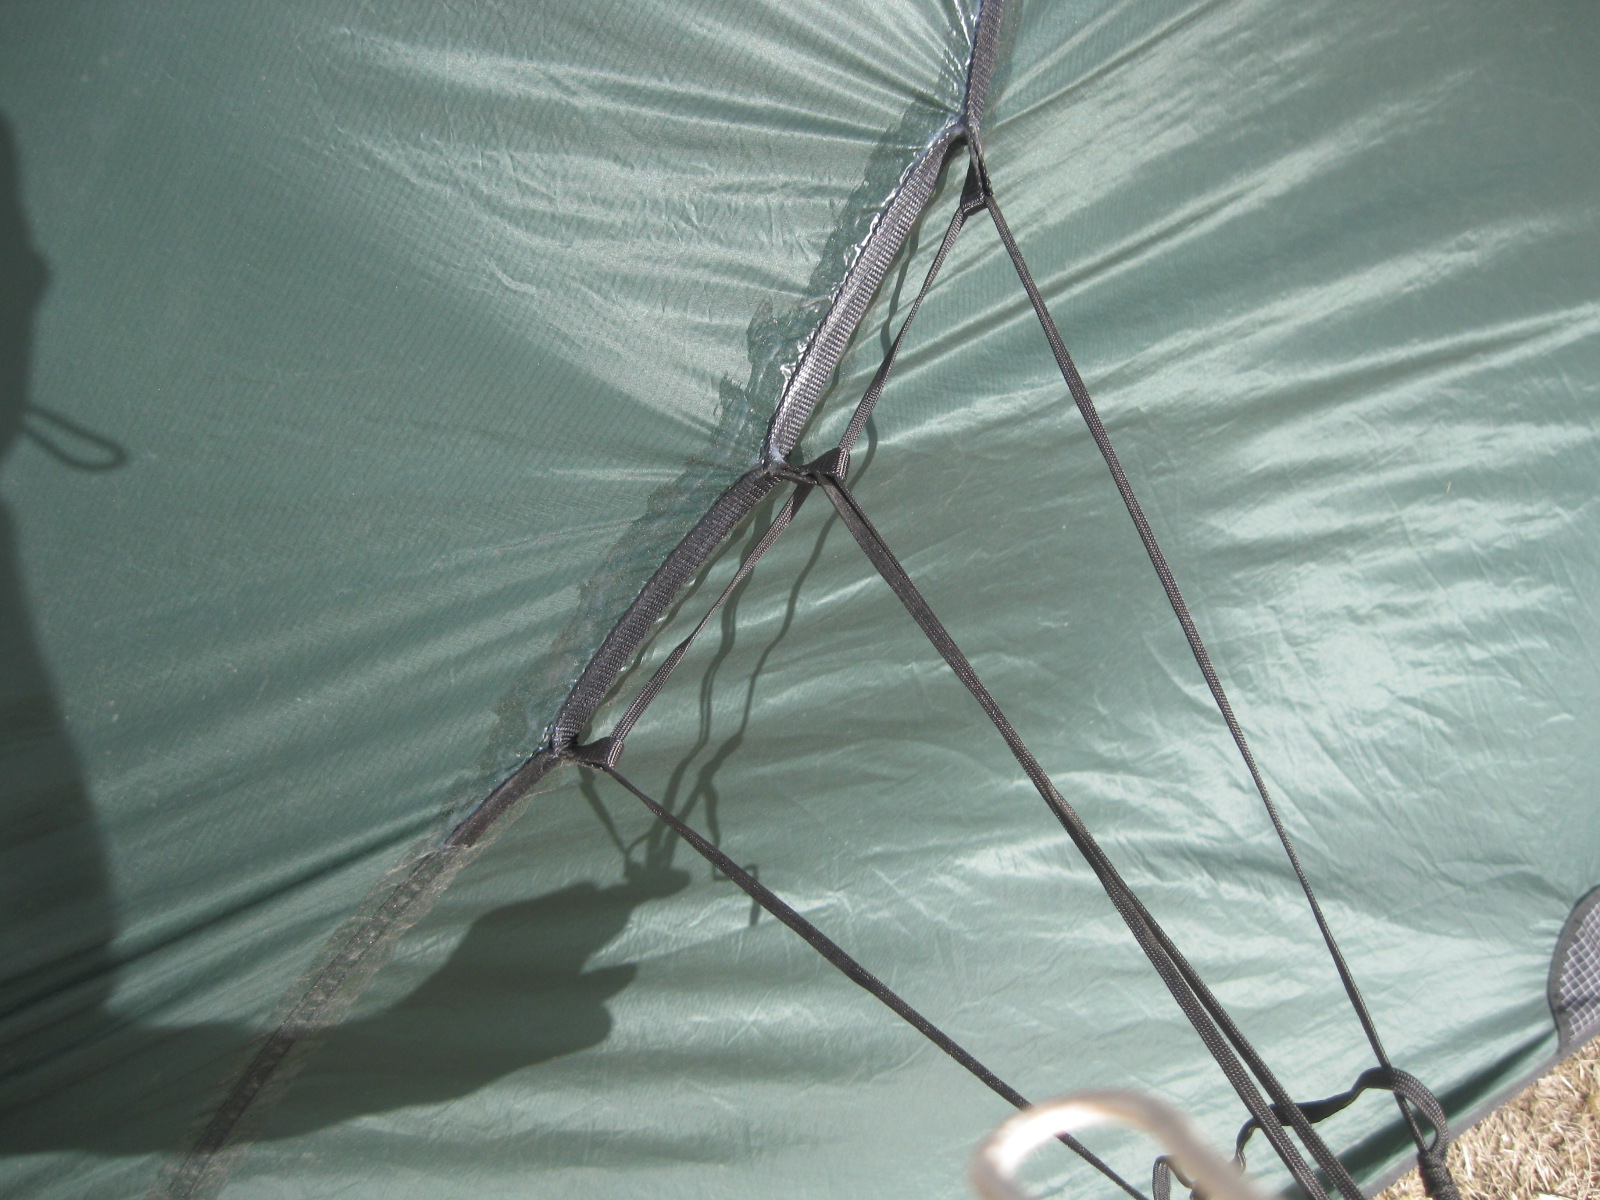
The last thing to look at for an initial perspective is the inside of the shelter, where most of the time will be spent.
 A factor that goes into just about every decision made in regard to my gear is the simple fact that the world is built for a man 6' tall. For a guy who is 6'5" this can present many a problem. The Vertex 5 has plenty of room for the taller than average human being from the door to the back end of the shelter. For the picture above I was in the doorway of the shelter, if that helps give a little perspective.
Next weekend I am hoping to get out and sleep in it, and may even get a little ambitious and get the stove jack sewn in. Send whatever questions you have my way.

Next weekend I am hoping to get out and sleep in it, and may even get a little ambitious and get the stove jack sewn in. Send whatever questions you have my way.
Subscribe to:
Posts (Atom)